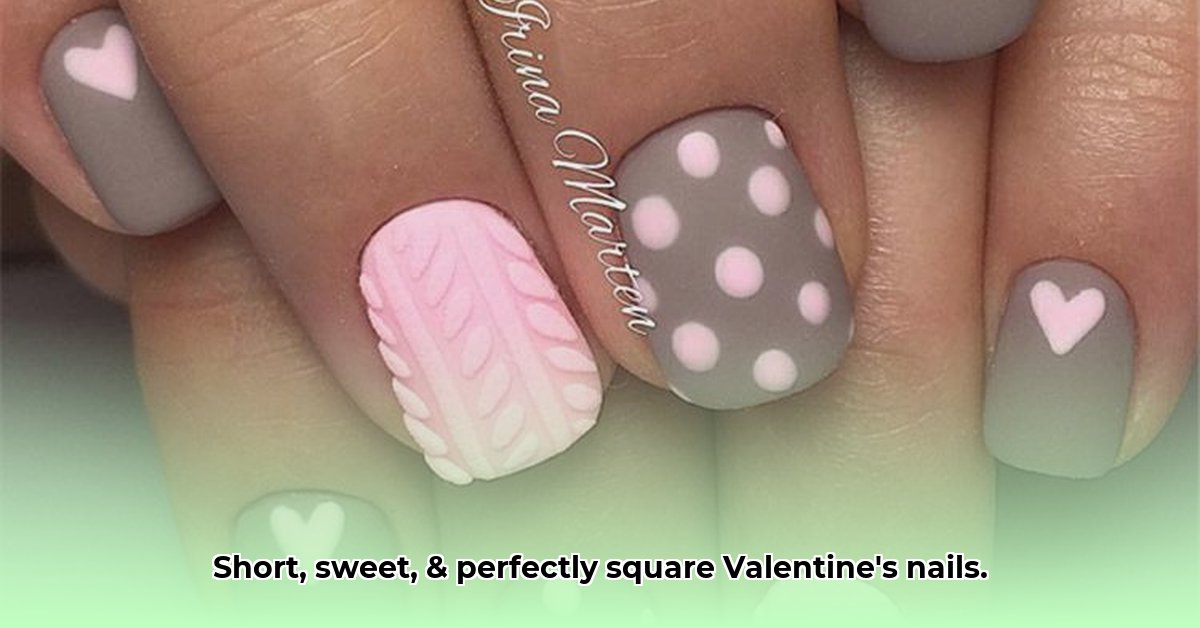
Ready to rock some seriously cute Valentine's Day nails? Short, square nails are totally trending, and they're the perfect canvas for showcasing your romantic side. Forget those super-long, hard-to-manage nails – short and sweet is where it's at! This guide will walk you through creating adorable designs, perfect for even the most nail-art-challenged among us.
Get Your Nails Ready for Romance!
Before diving into the fun part (the designs!), prepping your nails is crucial. Think of it like prepping a canvas before painting a masterpiece – you want a smooth, even surface for your Valentine's Day mani. Gently push back your cuticles using a cuticle pusher (or your fingernail). File your nails into a neat square shape using a fine-grit nail file to prevent chipping. Finish with a base coat to protect your natural nails and improve polish longevity.
Sweet Valentine's Day Nail Art Ideas for Short Squares
We've curated some seriously adorable ideas for your short square nails:
Minimalist Hearts: Delicate blush pink or classic red hearts scattered across a nude or pastel background offer a perfect blend of romance and understatement.
Blush Pink with Glitter: A soft blush pink base with a touch of sparkly glitter creates a dreamy, romantic look. Use glitter polish or sprinkle loose glitter onto wet polish for extra shine.
Gingham Glam: A playful gingham pattern in soft pinks and reds is surprisingly chic for Valentine's Day. This design requires a bit more skill, but the result is well worth the effort!
Metallic Magic: Elevate your manicure with gold or silver foil accents. Thin strips of foil can work as elegant borders, or small metallic studs add a glamorous touch.
Subtle Red & Pink Gradient: A beautiful blend from blush pink to a deeper red is effortlessly chic and very Valentine's Day-appropriate. It’s a modern yet romantic look.
Step-by-Step: Minimalist Hearts – A Beginner's Guide
This design is perfect for beginners! Let's create those adorable minimalist hearts:
Step 1: Apply a base coat to clean, dry nails and let it dry completely. This is essential for a longer-lasting manicure!
Step 2: Paint your nails with your chosen base color (nudes, pastels, and light pinks work best). Let it dry thoroughly.
Step 3: Using a thin detail brush (or even a toothpick!), carefully paint tiny hearts using a contrasting color (red, pink, or metallic). Don't worry about perfection—imperfect hearts add charm!
Step 4: Once dry, apply a top coat for shine, protection, and longevity. This also helps blend everything nicely.
Nail Polish & Tool Recommendations
Here are some product suggestions to help you get started:
| Product Category | Product Suggestion (Example) |
|---|---|
| Base Coat | [Insert Brand Name and Link] |
| Nail Polish (Red) | [Insert Brand Name and Link] |
| Nail Polish (Pink) | [Insert Brand Name and Link] |
| Glitter Top Coat | [Insert Brand Name and Link] |
| Detail Nail Brush | [Insert Brand Name and Link] |
Troubleshooting Tips
- Uneven Application: Use thinner coats and let each coat dry completely.
- Smudging: Be patient and let each layer dry fully. A quick-drying top coat helps prevent smudging.
- Imperfect Hearts: Don't stress! Imperfect hearts add a charming, hand-painted look.
Design Variations & Expert Tips
Remember, these are just suggestions. Experiment with different colors, add gems, or incorporate other embellishments to create a manicure that reflects your unique style. "The key is to have fun and create something you love," says [Expert Name], [Title] at [Institution]. "Don't be afraid to experiment!"
Don't forget to share your creations! Use #ValentinesDayNails #ShortSquareNails on social media to inspire others. Happy Valentine's Day!